
head and right after body opens). After that you add analytics and ads tags in the GTM UI instead of redeploying site code. Below: create account and container, where the code goes, WordPress and builder options, first tags after install (GA4, Meta Pixel), and how to avoid double counting.Installing Google Tag Manager takes a few minutes and removes most developer tickets every time you need a new event, pixel or conversion. For an owner in the US, Canada or the UK that is fewer $ bills for “paste one more script” and fewer broken forms from hand-edited themes. Below is a practical install path.
If the container model is still unclear, start with the base explainer: what Google Tag Manager is.

2:27 Why install Analytics via GTM
3:00 Installing GTM on a site

16:48 Installing GTM on a site
Place the first container snippet in the page head.
Place the second snippet immediately after the body opens.
Test the container before publishing it.
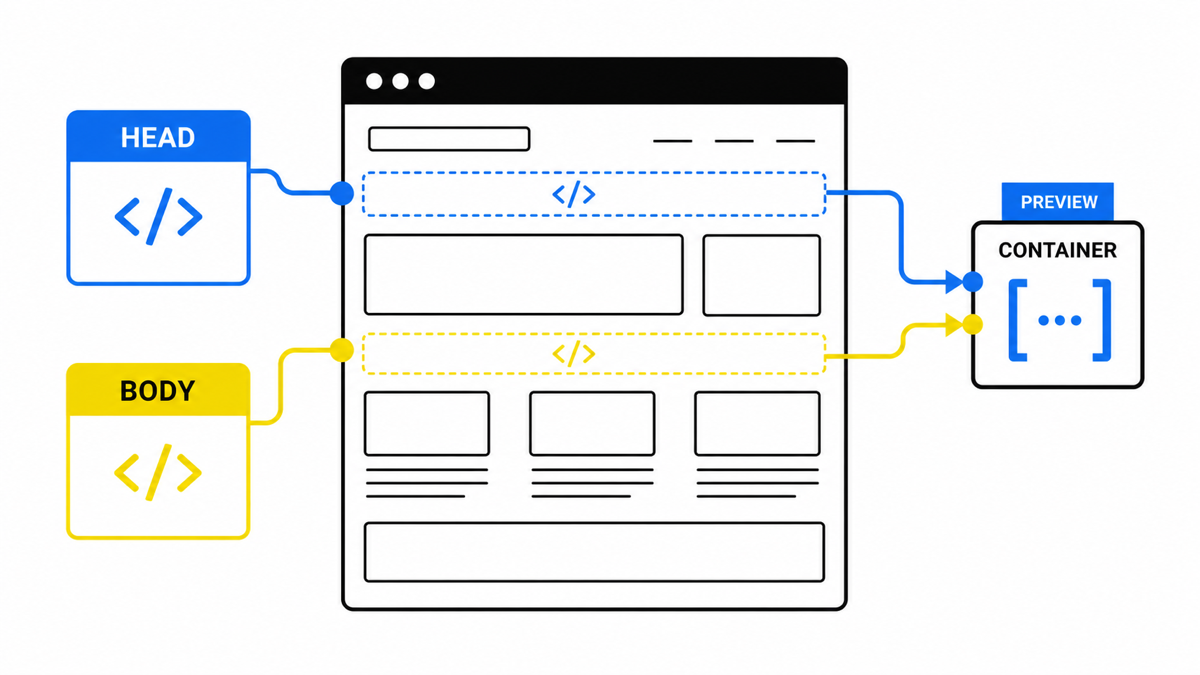
How to connect Google Tag Manager
Open Google Tag Manager and do the following:
- Create an account.
- Give it a clear name (company or brand).
- Select the country you operate from.
- Create a container. The name is often the site domain. Choose the platform type:
- Web – almost always the right choice for a normal website.
- iOS / Android – for a native app. Best to ship GTM during app development: changing app code is harder than changing a site.
- AMP – accelerated mobile pages; uncommon now, mostly news-style properties.
Click Create, review the terms, and accept.
- Install the container code as Google shows it:
- Copy the top snippet and paste it immediately after the opening
<head>tag. - Copy the bottom snippet and paste it immediately after the opening
<body>tag.
- Copy the top snippet and paste it immediately after the opening
In a browser you can inspect the page source to confirm placement. On a CMS you often use a theme “Custom code” field or a plugin instead of editing templates by hand. The requirement is the same: the container must load on every page you care about.
Once the snippets are live, the useful next step is not “fire every pixel at once”, but open Preview and add only the events you need to manage ad spend in $.
Tags and reports matter when they show payback. My e-book “19 Google Ads Secrets” shows how to get the most out of Google Ads without draining your budget, drawn from real campaigns and tests.
See the book →Close the install dialog in GTM when the code is in place.
Install notes for WordPress and other platforms
The path depends on the builder or CMS:
- On Wix, Squarespace, Webflow, Shopify and similar platforms there is often a native Google Tag Manager field. Paste the container ID (GTM-XXXX) into site settings.
- For WordPress, plugins such as GTM for WordPress inject the snippets after you enter the container ID. Similar modules exist for Joomla, Drupal and other CMS stacks.
If you cannot find where to paste the code, contact the platform’s support team. Alternative for WordPress: pay a developer once in $ to inject the container, then manage tags yourself in GTM without theme edits.
First steps after installing Google Tag Manager (GTM) on the site
After the container loads, most accounts start with Google Analytics (GA4 / Google tag). GTM already has an All Pages trigger. Use it for the base analytics tag; add Meta (Facebook) Pixel the same way if you need remarketing.
Create a tag, name it clearly (for example GA4), choose Google tag / Google Analytics: GA4 Configuration (labels vary slightly by UI). Paste the Measurement ID in G-XXXX format from GA4 Admin → Data streams.
Save every change. For real visitors it must be published: Submit → Publish. Draft tags do not fire in production.
Meta Pixel follows the same pattern: All Pages trigger, tag type Custom HTML, base pixel code from Meta Events Manager. Always check Preview so you do not double-fire a pixel already hard-coded in the theme.
Next you can add triggers for a specific URL, click, scroll or form submit. Test each tag in Preview. GTM keeps versions if you need a rollback. For the base tag setup after installation, see how to set up Google Tag Manager.
Takeaways on installing GTM
Installing the container is a short technical step. After that you can collect the data ads and analytics need without constant code deploys:
- where traffic comes from;
- which elements people click (buttons, links, click-to-call);
- which products or services they choose;
- how far they scroll;
- how often they submit a lead form.
The hard rule for clean measurement: once you move to GTM, GA4 should load through the container, not in parallel as a hard-coded theme tag. If Analytics was already installed directly, remove the direct code and reconnect GA4 via GTM, or pageviews and events will double-count.