
You configure Google Tag Manager after the container is already installed on the site. Below is a practical base set for owners in the US, Canada and the UK who need reliable ads and analytics data for a Google Ads campaign audit without constant developer tickets.

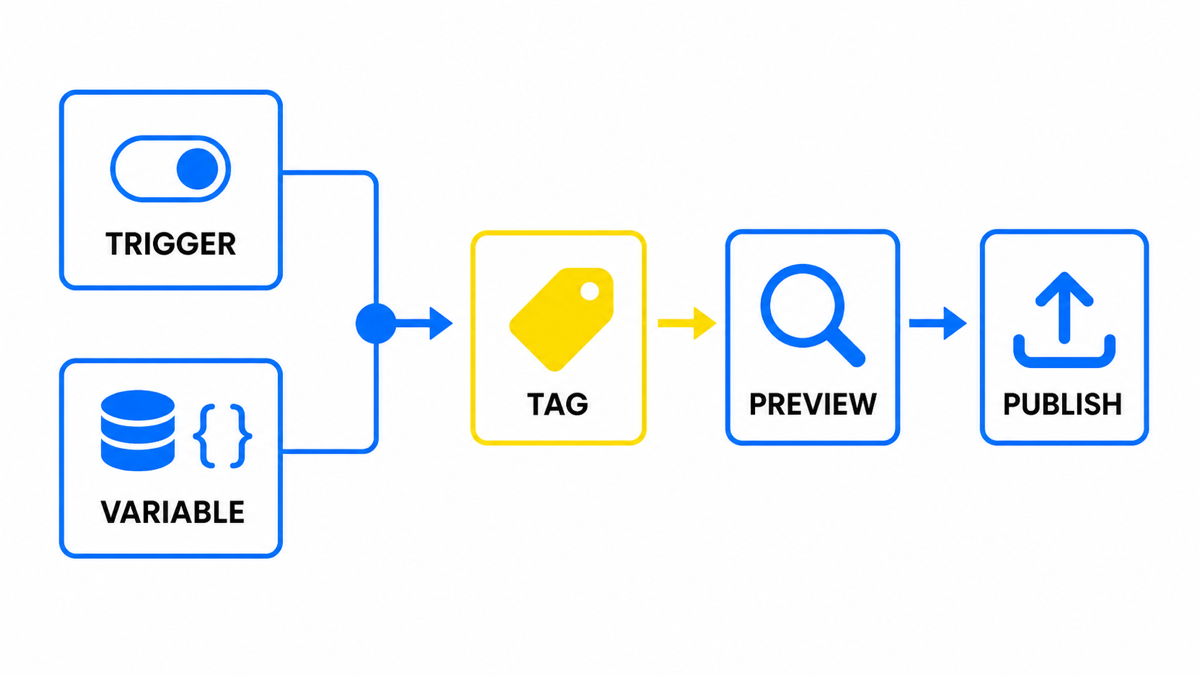
A minimal working set usually includes:
- a Google Analytics tag (GA4 / Google tag);
- a Conversion Linker tag when the container does not already load a Google tag site-wide or a separate Linker is otherwise needed;
- a 15-second engagement signal;
- a conversion tag (thank-you page, form submit or key click).
Connect a tag to its trigger and required variables.
Test the real user action before release.
Release the reviewed container version.
How to add Google Analytics while setting up GTM
Open your GTM container. Left menu: Tags → New. Then:
- Trigger: All Pages (built-in; no need to create it). Name the tag clearly, for example GA4 or Google tag.
- Tag configuration: choose Google tag / Google Analytics: GA4 Configuration from the type list (wording varies slightly by UI).
- Measurement ID: paste the GA4 Measurement ID (G-XXXX) from Admin → Data streams. Save the field or a settings variable.
- Publish: Submit → Publish. Draft tags do not fire for real users.
How to add Meta (Facebook) Pixel in Google Tag Manager
Many accounts also need Meta Pixel for remarketing. Trigger: All Pages again. Name: Meta Pixel. Tag type: Custom → Custom HTML. Paste the base pixel code from Meta Events Manager. Save. Always check Preview so you do not double-fire a pixel that was already hard-coded in the theme.
How I design a GTM container
I treat the container as a system of agreements, not a folder of tags. For each item I record purpose, firing condition, consent dependency and business owner, then enforce one naming structure. That lets me read the container without opening every tag and separate production setup from temporary tests.
Architecture notes are in Google’s docs on Tag Manager.
How to add the Conversion Linker tag in GTM
Conversion Linker stores ad click data (for example in first-party _gcl_* cookies) so conversion tags can attribute later conversions. Google’s Tag Manager help also states that if the container already loads a Google tag on every page, a separate Conversion Linker tag is not required (Google Ads / Floodlight tags load a Google tag first). Use a dedicated Linker only when you need the tag type itself or do not yet have a site-wide Google tag:
- Tags → New.
- Trigger: All Pages.
- Name, for example Conversion Linker.
- Configuration: Conversion Linker (under recommended / advertising tags).
- Almost no extra fields: Save, then publish with the rest of the container.
How to track that someone stayed on the site for a set time
A common setup: fire when a user has been on the page for at least 15 seconds. This is an engagement signal, not a sale. Steps:
- In Triggers create “15 seconds”:
- type: Timer;
- interval: 15000 ms;
- limit: leave blank or set 1 if you want a single fire;
- enable when: always true, for example Page URL matches RegEx
.*.
- In Tags create “GA4: engaged 15s”:
- trigger: the timer you just made;
- configuration: GA4 Event (or Google tag event, depending on UI);
- event name: for example
engaged_15s; - advanced settings: fire once per page, otherwise a long-open tab floods analytics;
- save and publish.
Once pageviews and engagement fire cleanly, the next useful step is a real business action (thank-you page, form submit, “Order” click) so Google Ads optimises on outcomes, not only visits.
Tags and reports matter when they show payback. My e-book “19 Google Ads Secrets” shows how to get the most out of Google Ads without draining your budget, drawn from real campaigns and tests.
See the book →How to set up a conversion in Google Tag Manager
The simplest path: after checkout the user lands on a thank-you page. Trigger on that URL. Fire a GA4 event (and/or a Google Ads conversion tag if you implement it in GTM).
Often you must capture a button click or a form submit instead.
For a click:
- Trigger → New → name it “Click Order”.
- Type: Click – All Elements (not only links). Buttons are often not
<a>tags. - Some clicks, not all clicks: otherwise the tag fires on every click on the page.
- Condition from built-in click variables: Click Text is usually safest. Paste the button label exactly as in the HTML, for example “order now”. Class and ID often repeat across buttons.
- Multiple buttons: use one
Click Textcondition withmatches RegEx, for example^(order now|book a consult)$. Separate condition rows are combined with AND, not OR.
Copy the button text from the HTML, including spaces and case. If the string does not match, the tag will not fire and analytics will stay empty.
Then create the event tag:
- Name: “GA4: click order”.
- Type: GA4 Event.
- Event name: for example
click_order. - Optional parameters: button_text, page_path.
- Trigger: Click Order. Save, Preview, publish.
In GA4 mark the event as a key event / conversion if that is the business signal. If the same action also feeds Google Ads, verify arrival in DebugView or Tag Assistant, not only a green fire in GTM Preview.
Takeaways on setting up Google Tag Manager
- This is only a base layer. GTM can track scroll depth, form submits, purchases, phone clicks, add-to-cart and pop-ups. The event map should follow the business, not a maximalist checklist.
- Container and tag docs live in Google Tag Manager help and related posts (what GTM is, Consent Mode, enhanced conversions).
- GA4 metrics later drive bidding and remarketing. Without events, automation optimises noise, and $ is spent blind.
- After the one-time container install, most changes do not need a developer. Preview and versions make rollback possible. Developers are mainly needed at install time or for a proper dataLayer.