
Running advertising without analytics means making decisions without seeing what visitors do. You can place Google Analytics directly in a site’s HTML, but that approach limits how easily you can track meaningful actions.
Installing Google Analytics through Google Tag Manager makes the setup more flexible. You can measure transactions, orders, cart additions, phone clicks, link clicks, button clicks, and other interactions. That information matters when you need to understand customers and judge whether advertising produces useful outcomes.
How to install GA4 through Google Tag Manager
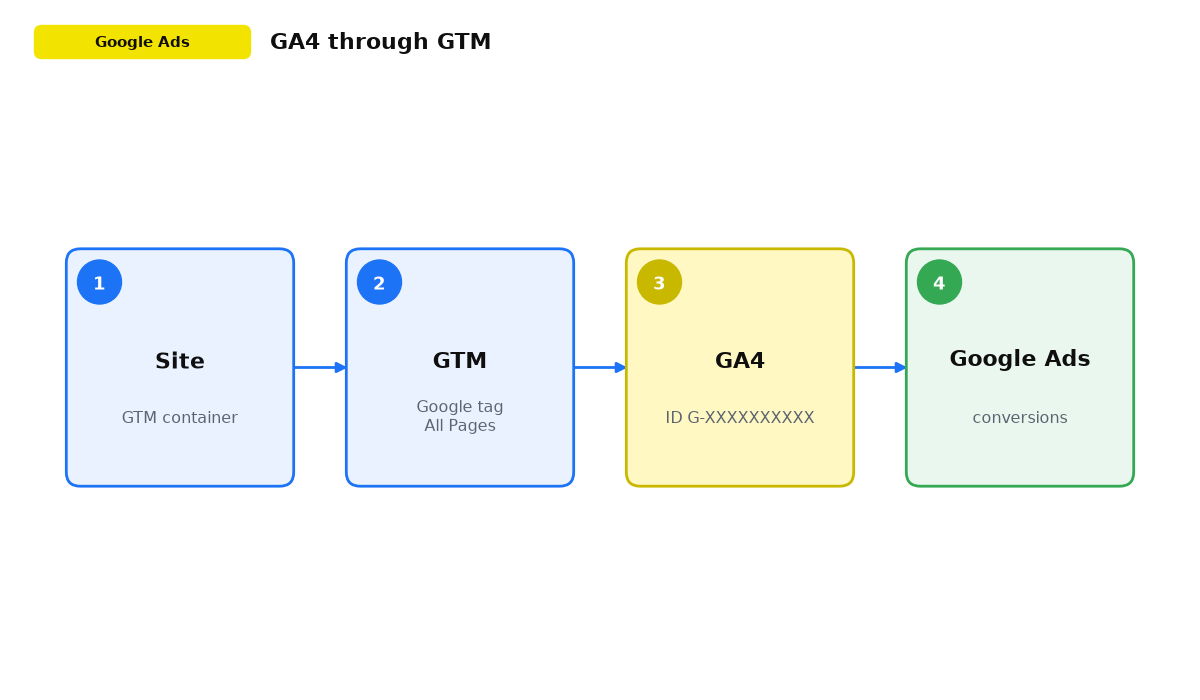
Before you configure the connection, register a GA4 property and install a Google Tag Manager container on the site.
How I approve a GA4 installation
I consider the installation complete only after testing it in Preview and DebugView. I perform the target action and confirm that the required key event was actually recorded. Publishing a tag by itself proves nothing.
Google recommends checking key events in DebugView. A marker next to the event name shows that tracking is working correctly.
Create a new tag in Google Tag Manager:
- Open Tags and select Create.
- Replace Untitled Tag with a clear name such as GA4 configuration.
- Choose the recommended tag type that connects GA4. Depending on the GTM interface, it may appear as Google tag or Google Analytics: GA4 Configuration.
- Paste the GA4 Measurement ID in the form G-XXXXXXXXXX. Find it in GA4 under Admin, then Data Streams. Open the relevant web stream and copy the ID from its details.
- Select the All Pages trigger. It is available immediately after the GTM container is installed and makes the GA4 tag fire on every page. The same trigger can also support tags for Meta Pixel and other analytics services.
- Do not choose a separate tracking type for this tag. That belonged to the old Universal Analytics setup. The GA4 tag sends the basic page view event when it fires.
- Save the tag.
- Select Submit, optionally name the GTM version, and then select Publish.
GA4 should now receive page view events from site visits. Businesses commonly use GTM with Google Ads so they can see what visitors from paid campaigns do after arriving on the site.
How GA4 measures engagement and bounce rate
Universal Analytics, which Google discontinued in July 2023, treated any visit without a click or second page view as a bounce. A person could spend an hour reading prices and product information and still count as a bounce. Older guides therefore recommended a 15-second GTM timer to improve that metric artificially.
GA4 handles this inside the platform. It marks a session as engaged if the visitor spends at least 10 seconds on the site, views two or more pages, or completes a conversion event. GA4 calculates engagement rate and the corresponding bounce rate without an extra GTM rule.
A manual timer can still help when you need a more precise measure of time on a particular page, such as a long landing page or article. It is no longer a tool for fixing bounce rate.
These signals also show which campaigns bring engaged visitors and which ones waste budget. Once enough data accumulates, review the full account with this Google Ads diagnostic tree audit.
At this point, the base connection and GA4 engagement logic are clear, so you can decide whether your business also needs a custom time event.
Tags and reports matter when they show payback. My e-book “19 Google Ads Secrets” shows how to get the most out of Google Ads without draining your budget, drawn from real campaigns and tests.
See the book →How to create a 15-second tag in Google Tag Manager
Create a new trigger in GTM:
- Name it 15 seconds.
- Choose Timer as the trigger type.
- Enter 15000 in the Interval field because GTM uses milliseconds. Entering 15 would make the trigger fire almost immediately.
- Add a condition that starts the timer. If it should always run, use a page address condition that is always true.
Then create the tag:
- Give it a clear name such as timer event.
- Create a Google Analytics: GA4 Event tag that uses the same Measurement ID as the Google tag, then attach the 15 seconds trigger.
- Do not look for a tracking type field. That belonged to Universal Analytics. In a GA4 Event tag you set an event name and optional parameters.
- Use an event name such as engagement_15s, plus any necessary parameters. GA4 does not use the Universal Analytics combination of category, action, and label.
- Under advanced settings, select Once per page so GA4 receives one signal during the page visit.
- Save, submit, and publish the tag.
How to verify the Google Analytics installation
You can confirm that the GA4 tag works in two ways:
- Select Preview in Google Tag Manager, enter the site URL, and confirm that the tag fires.
- Open GA4 DebugView, perform the target action, and confirm that the event is recorded. The real-time report can give a first signal, but DebugView is what confirms the key event.
Connect GA4 through GTM if you want reports to include the form, click, scroll, and other tags that you configure in Tag Manager.
If Google Analytics was previously installed directly in the site HTML, remove that code to avoid duplicate data. Ask a developer if you are not comfortable editing code. Also check for an old Universal Analytics property with an ID such as UA-XXXXXXX. Google stopped UA data collection in July 2023, so it no longer measures activity. The working property should be GA4, identified by an ID such as G-XXXXXXXXXX and connected through GTM.
A 10-minute installation checklist
- Register a GA4 property and create a web data stream for the site.
- Copy its Measurement ID in the form G-XXXXXXXXXX.
- Install the Google Tag Manager container on every page.
- Create the GA4 tag in GTM, paste the Measurement ID, and use All Pages as the trigger.
- Save the tag and publish the GTM changes.
- Test the setup in GTM Preview and GA4 DebugView, not only in the real-time report.
- Remove any previous direct Analytics code and stop relying on Universal Analytics.
- Configure the events and conversions that matter to the business, such as forms, clicks, and transactions.