
You do not need to learn every Google Tag Manager feature before you can track enquiries on your website. Start with a concrete business task: connect analytics, record a useful visitor action, and check that the event reaches your reports. That gives your GTM training a practical purpose from the start.
There are thousands of articles, videos, and courses covering GTM’s technical details. I recommend learning the overall method and simple tasks first. The finer points are easier to approach once you know why your website needs them.
How Google Tag Manager works
GTM connects a condition on your website with an action you want to run. A visitor clicks a button, submits a form, or opens a page. When that event meets the condition you have set, GTM fires the relevant tag.
Separate these two concepts:
- Trigger. Defines when something should happen, such as after a visitor clicks a particular button.
- Tag. Defines what should run when that condition is met, such as sending an event to analytics.
For a business owner, this connects visitor behaviour with information in a report. First decide which website action matters. Then set the condition that detects it and the tag that passes the information on.
How to structure your Google Tag Manager training
If you want to design analytics and website data processing systems professionally, you will need to study GTM in depth. Connecting analytics and tracking basic customer actions uses a smaller part of its capabilities.
How I teach a shared approach to GTM
I teach people to treat a GTM container as shared code, even when it contains no conventional programming language. A variable’s name should explain the data it holds. A trigger should describe a condition. A version should record why something changed and what result is expected. These conventions help another specialist understand the container and continue the work after a handover without needing every element explained aloud.
Google provides an official starting point in its Google Tag Manager documentation for websites.
I focus on four skills for getting started: installing GTM, working with triggers, configuring tags, and connecting GTM with GA4. The five lessons in our Google Tag Manager course are built around these tasks.
Installing GTM on your website
If your website builder has a built-in GTM integration, you may only need to enter the container ID in the relevant field. For a custom website, the GTM code is added to the HTML: one part in head and the other in body.
Working with triggers
Learn how to respond to common visitor actions:
- Opening a page.
- Scrolling to a particular element.
- Clicking a button or another element.
- Watching a video.
- Submitting a form.
- Following a particular link.
Start with clicks and form submissions. Then explore timers and scrolling if your measurement task calls for them. You do not need to master every trigger before completing your first useful setup. The five lessons in our Google Tag Manager course provide a route through these basics.
Working with tags
GTM offers many tags, but start by understanding these common jobs:
- Connecting Google Analytics using the Google tag.
- Using custom HTML for third-party tools, such as Hotjar or the Meta pixel.
- Working with the Conversion Linker tag.
- Sending events, including form submissions.
For each tag, understand which fields need values and which trigger should fire it. Having a tag in the container does not by itself mean that the intended action is being measured.
Connecting GTM and Google Analytics
This connection lets GA4 receive events configured through Google Tag Manager. Information about visitor actions then becomes available for analysis.
With correctly configured events, you can assess which campaigns bring in enquiries. Use those figures to carry out a fuller review of wasted Google Ads spend.
Our Google Tag Manager course covers these four skills across five lessons with video explanations. Work through them in the order below and apply each step to your own website.
Lesson 1
The first lesson explains what GTM is for and which tasks it helps you handle. Once the container is installed, you can make many tracking changes yourself, including adding new actions to measure and sending data to analytics tools. That reduces the need to ask a developer for every adjustment.
For Google Ads, the practical aim is to track what people do after advertising brings them to your website. As a service business owner, you need to understand how an ad visit connects with an enquiry. Before using those figures to change your advertising, check the quality of your measurement.
Lesson 2
How to install Google Tag Manager.
The second lesson covers container installation. You learn how GTM code fits into your website’s HTML and how to approach installation when the site uses a website builder.
It also addresses what to do when you cannot find a ready-made guide or plugin. That may happen with a custom site or a website using WordPress, Joomla, or Drupal. The aim is to move from choosing an installation method to having a connected container.
Lesson 3
Setting up Google Tag Manager.
Once GTM is installed, move on to variables, parameters, and events. Using a button click as the example, learn:
- Which configuration to choose for the action you want to track.
- When to build a condition around Page URL and when an element’s ID or class is relevant.
- How conditions control when a trigger fires.
- What to do when a button is not a link.
Lesson 4
Tracking target actions in GTM.
Tracking form submissions through GTM.
Websites may sell different services, but the principles for measuring useful actions are often similar. At this stage, you learn to track form submissions, element clicks, page visits, and scrolling to a chosen element.
Checking tags in preview mode is a separate part of that work. You need to see whether the tag fires under the condition you actually intended to measure.
Lesson 5
Installing Google Analytics through GTM.
The fifth lesson explains how to connect Google Analytics through Google Tag Manager. It takes you through the setup step by step so information about visitor behaviour can reach analytics.
That gives you a basis for comparing advertising channels, understanding your audience, and improving your ads. The connection becomes useful when you apply the events you collect to actual advertising decisions.
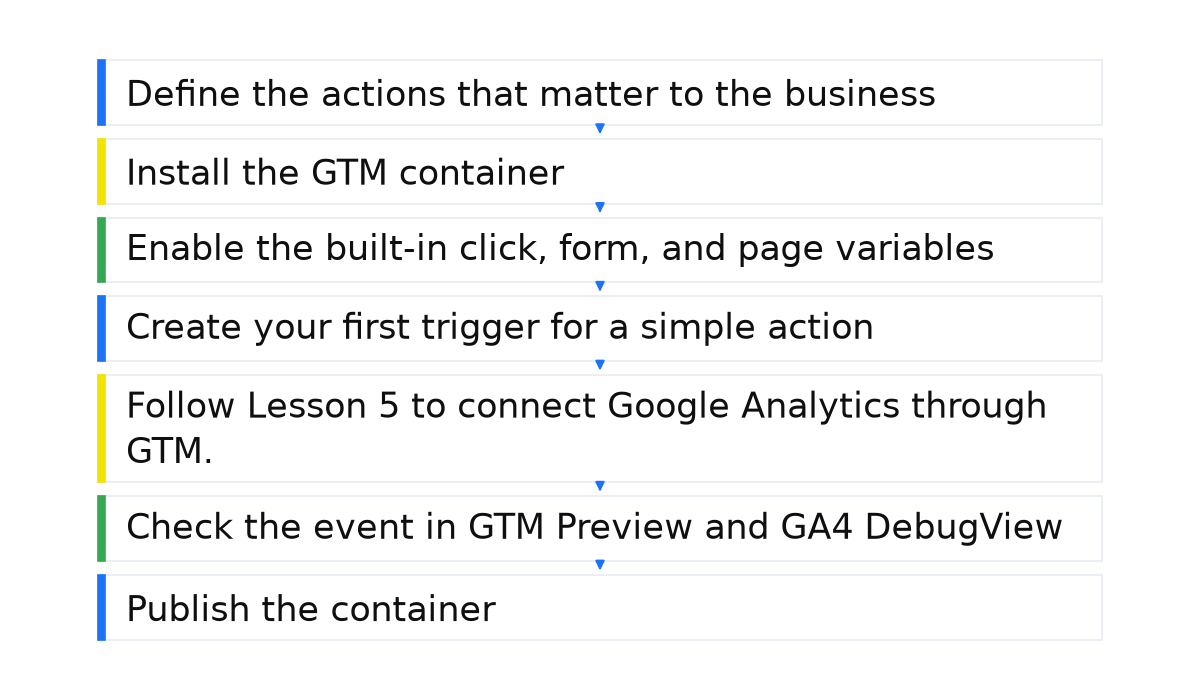
Google Tag Manager learning checklist
- Define the actions that matter to the business: an enquiry, a phone link click, a form submission, or a visit to a messaging service. Decide which actions you will count as conversions.
- Install the GTM container and check that it is available in preview mode.
- Enable the built-in click, form, and page variables so you can inspect the values used in trigger conditions.
- Create your first trigger for a simple action, such as clicking a specific button or successfully submitting a form.
- Follow Lesson 5 to connect Google Analytics through GTM. Then link the trigger to a GA4 event tag and give the event a clear name.
- Check the event in GTM Preview and GA4 DebugView before publishing the container.
- Publish the container and review the data the following day in GA4 and, if conversion transfer is configured, Google Ads. Inspect the reports as well as the tag’s firing status.
What next?
- GTM is not installed yet? Start with container installation.
- Need your first events and variables? Follow the GTM setup walkthrough.
- Want to record enquiries? Set up form submission tracking.
- Need data in analytics? Connect Google Analytics through GTM.
- Want to use conversions in advertising? Follow the Google Ads conversion setup process.
Related reading
- What the conversion cycle is and why to measure it.
- Using auto-tagging for website analytics.
What to take away from Google Tag Manager training
Google Tag Manager handles technical measurement tasks. When someone has already defined what to track, a short course can help you understand how to set it up. If you also choose the goals, you need a wider understanding of online marketing and visitor behaviour.
For example, a three-second timer can fire correctly without identifying a potential customer. Someone may have opened the site by mistake and still be working out where they have landed. A technically correct event may tell you little about the business result you want.
The five lessons in our Google Tag Manager course give you a basic sequence for advertising measurement. Start there, then study advanced topics as your website’s needs become clearer.
When this does not apply
- The basic lessons do not cover complex Ajax forms, server-side data transmission, or a nonstandard dataLayer.
- GTM does not replace an understanding of GA4’s event model or checks on data quality.
- Publishing a container without Preview and debugging can produce duplicate or incorrect events.
If your immediate goal is to see which enquiries your advertising brings in, begin with our Google Tag Manager course. Its five lessons help you work from container installation to event checks and apply that sequence to your own website.
My e-book “19 Google Ads Secrets”: how to get the most out of Google Ads without draining your budget, drawn from real campaigns and tests.
See the book →